Location groups
Break your game into groups where each section has its own routing, navigation, and completion rules. Groups let you create more complex games, for example, a story-driven experience with multiple acts, a scavenger hunt with different phases, or a campus tour with themed sections.
Groups contain locations. They can represent anything you want:
- A tutorial
- An act in a story
- A phase of your scavenger hunt
- A themed section of your tour
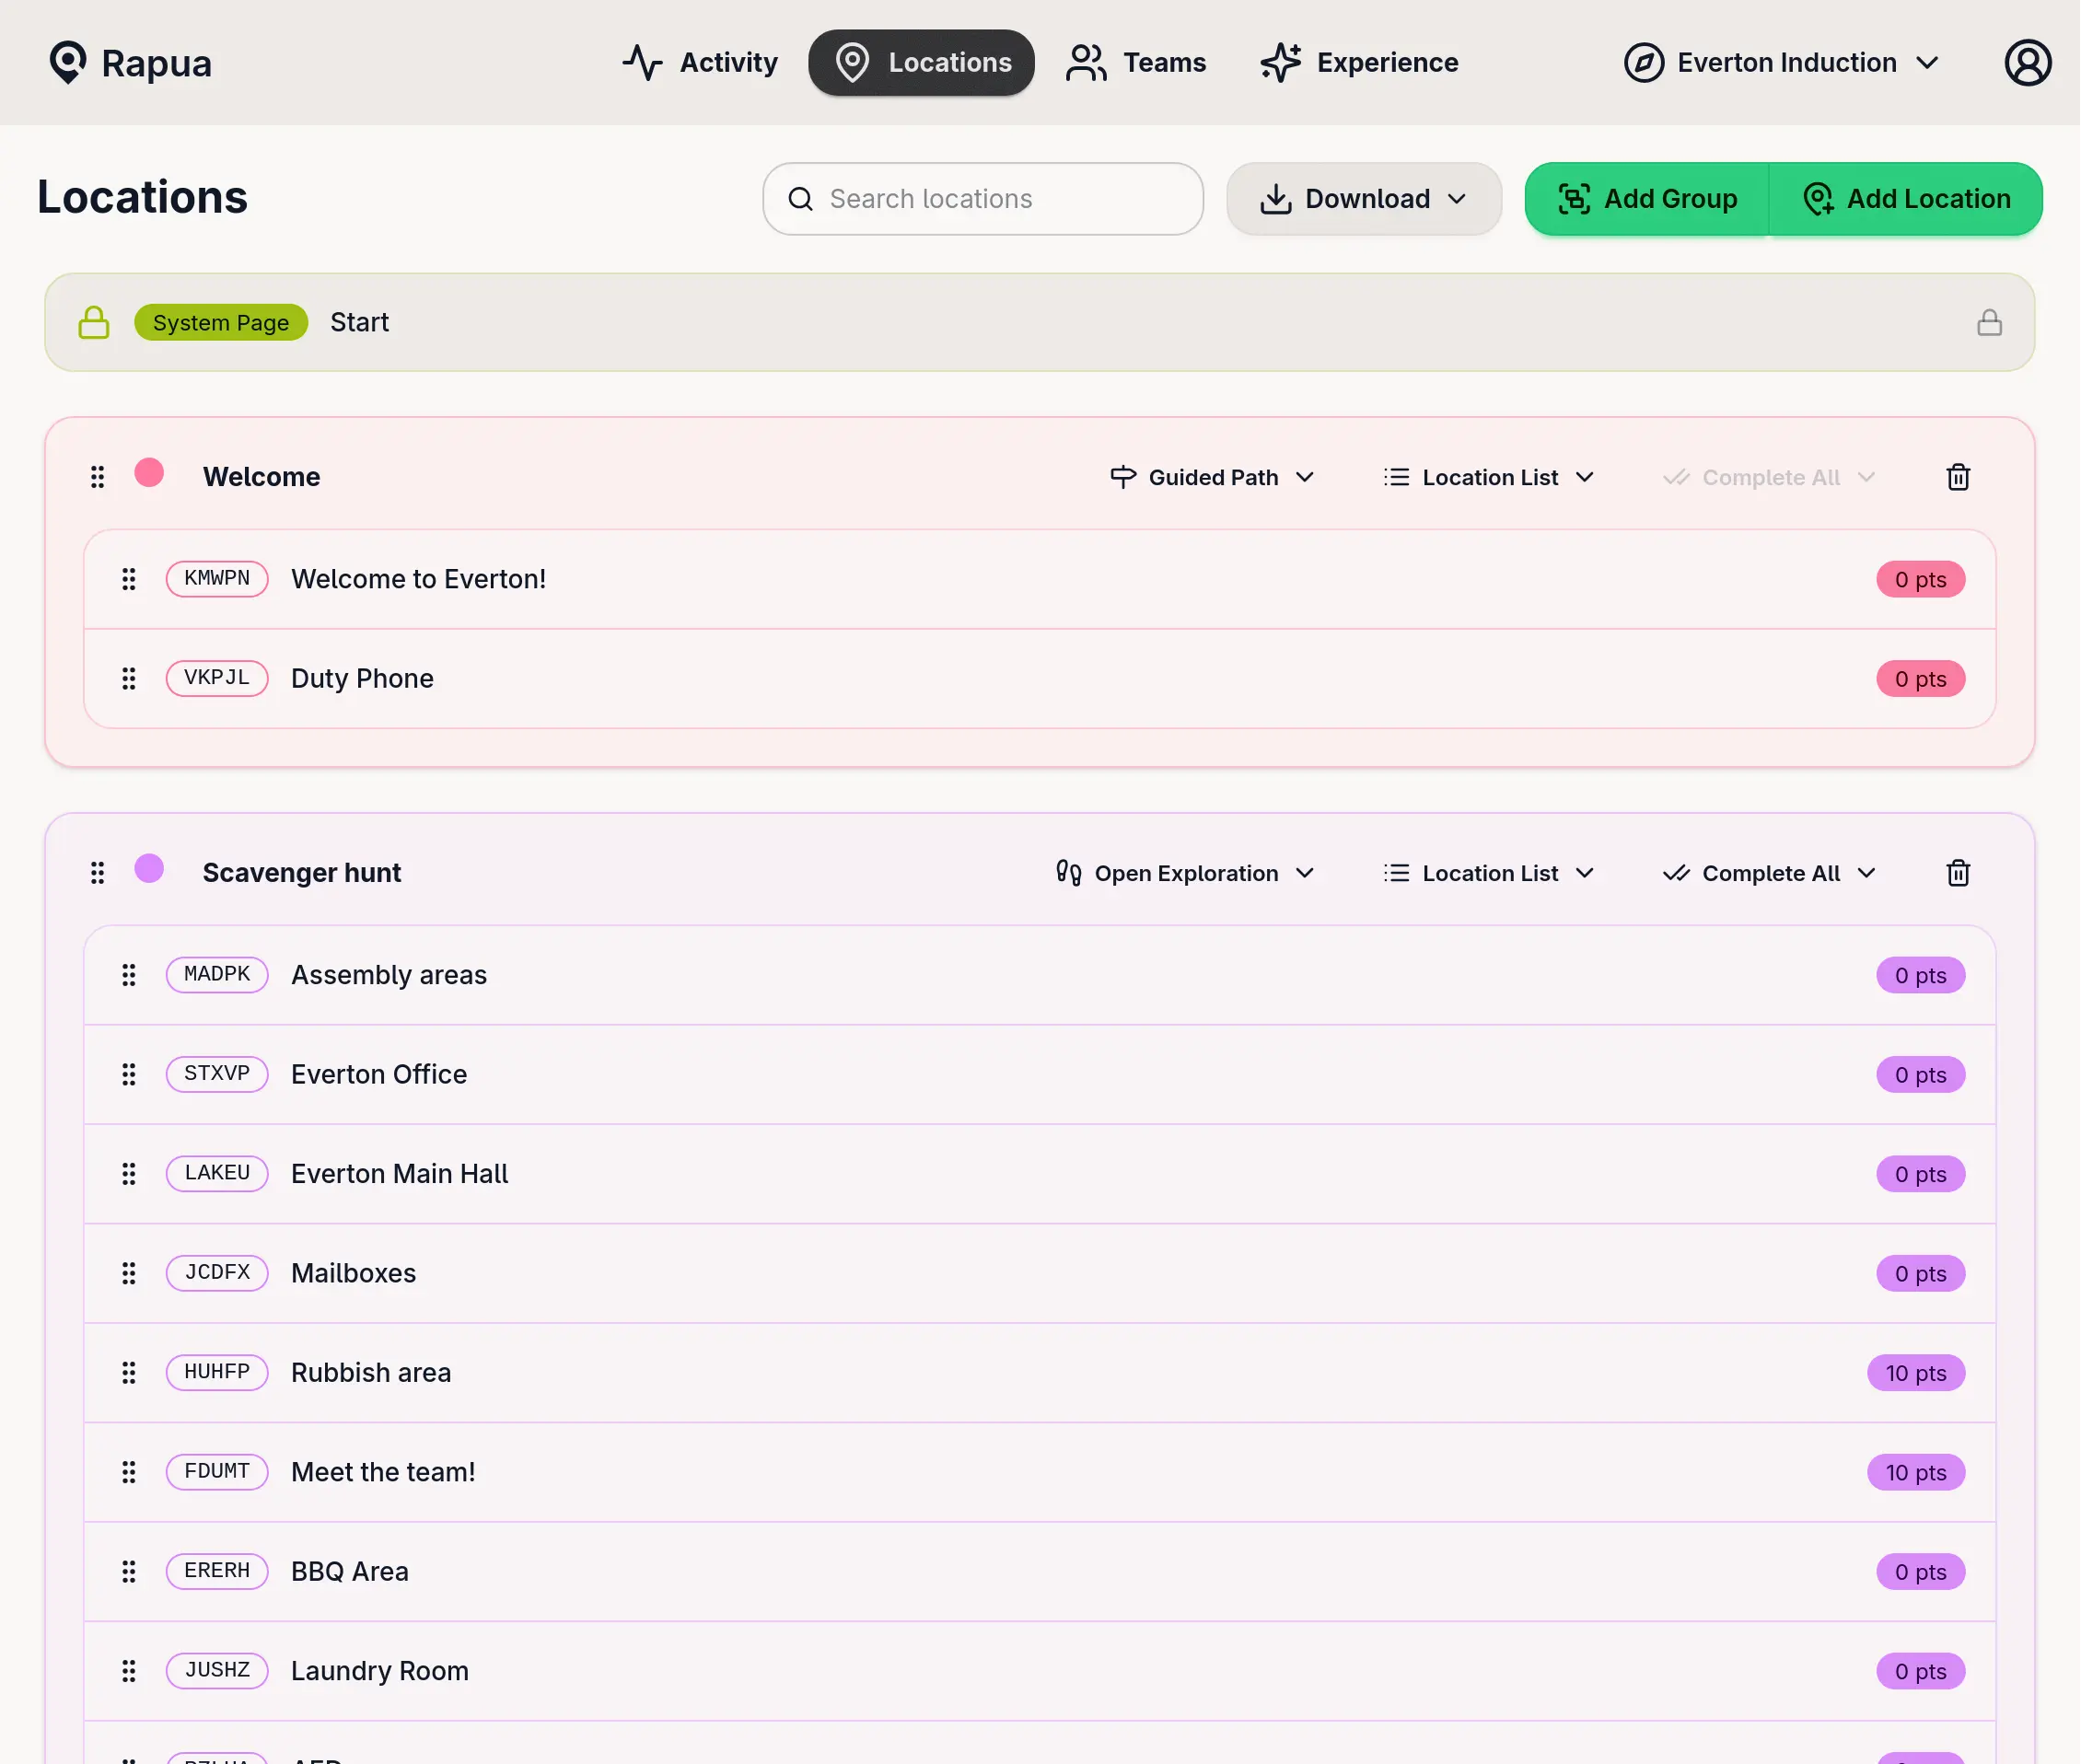
Creating a Group
- Go to Locations in your game admin
- Click
Add Group(top right) - Name it something meaningful (“Tutorial”, “Act 1”, etc.)
- Pick a color
- Drag locations in from the unassigned area
- Set routing, navigation, completion, and auto-advance
Changes save automatically.
Organizing with Drag & Drop
Drag locations between groups, reorder them within groups, or move entire groups around. The interface shows icons when locations need map coordinates (📍) or custom clues (🔍), depending on your navigation mode.
Settings
Routing
How players move between locations:
- Guided Path - One specific order. Players can’t skip ahead.
- Open Exploration - Any order, any time.
- Randomised Route - Show a random subset (1-10 locations). Good for crowd control.
Navigation Display
How locations appear to players:
- Map Only - Markers on a map (needs coordinates)
- Labelled Map - Map with names (needs coordinates)
- Location List - Simple text list
- Custom Clues - You write custom navigation blocks
When you pick Custom Clues, the location edit page shows a Clues section where you build the navigation experience.
Completion
How many locations before moving on:
- Complete All - Every location required
- Complete N - Just N locations (drag the slider)
Auto-Advance
What happens when requirements are met:
- On - Players jump to the next group automatically
- Off - Players can keep exploring even after hitting the minimum
(Always on for Complete All mode.)
Example: Story-Driven Game
Tutorial (Guided Path, Labelled Map, 1 location)
Act 1: Investigation (Open Exploration, Custom Clues, 4 of 6)
Act 2: The Choice (Randomised, Map Only, 1 of 3)
Act 3: Resolution (Guided Path, Location List, 2 locations)
The Ending (Guided Path, Custom Clues, 1 location)
Common Patterns
Campus Tour:
Welcome → Academic Buildings (5 of 10) → Student Life (random 3) → Final Stop
Museum:
Intro → Ancient History (all) → Modern Art (all) → Interactive (random 3) → Exit
Corporate Onboarding:
Check-In → HR & Admin → Department Tours (5 of 8) → Team Meetup (3 of 5) → Wrap-Up
Treasure Hunt:
Start → Find Clues (4 of 6) → Solve Puzzle → Choose Path (1 of 3) → Finale
Unassigned Locations
Locations at the bottom aren’t visible to players. Only locations inside groups are playable.
Use unassigned for:
- Work in progress
- Seasonal content you’ll activate later
- Testing
- Archive
Drag to activate. Drag back to deactivate.
Migrating from Old Versions
Existing games were automatically moved into a single group with your previous settings. Everything works the same. You can now add more groups if you want.
Quick Tips
Start with 2-3 groups (intro, main, conclusion) before getting fancy.
Use colors consistently. Maybe green = start, blue = explore, red = climax.
Walk through it yourself before launching. Does it flow? Are transitions smooth?
For randomized sections, 3-5 locations is the sweet spot. Too many options overwhelm players.
Name groups clearly. “Act 1” is better than “Group 1”.
Reference
| Setting | Options |
|---|---|
| Routing | Guided Path, Open Exploration, Randomised Route |
| Navigation | Map Only, Labelled Map, Location List, Custom Clues |
| Completion | Complete All, Complete N |
| Auto-Advance | On (auto), Off (manual) |
📍 = has map marker
🔍 = has custom clues